SAML
Process Objective#
SAML enables admin to update SAML settings.
Overview#
ProTag includes the ability to integrate SAML for login, which will allow you to login using third-party services such as OneLogin and JumpCloud.
Features and Functionality#
Here is the Update SAML Settings interface:
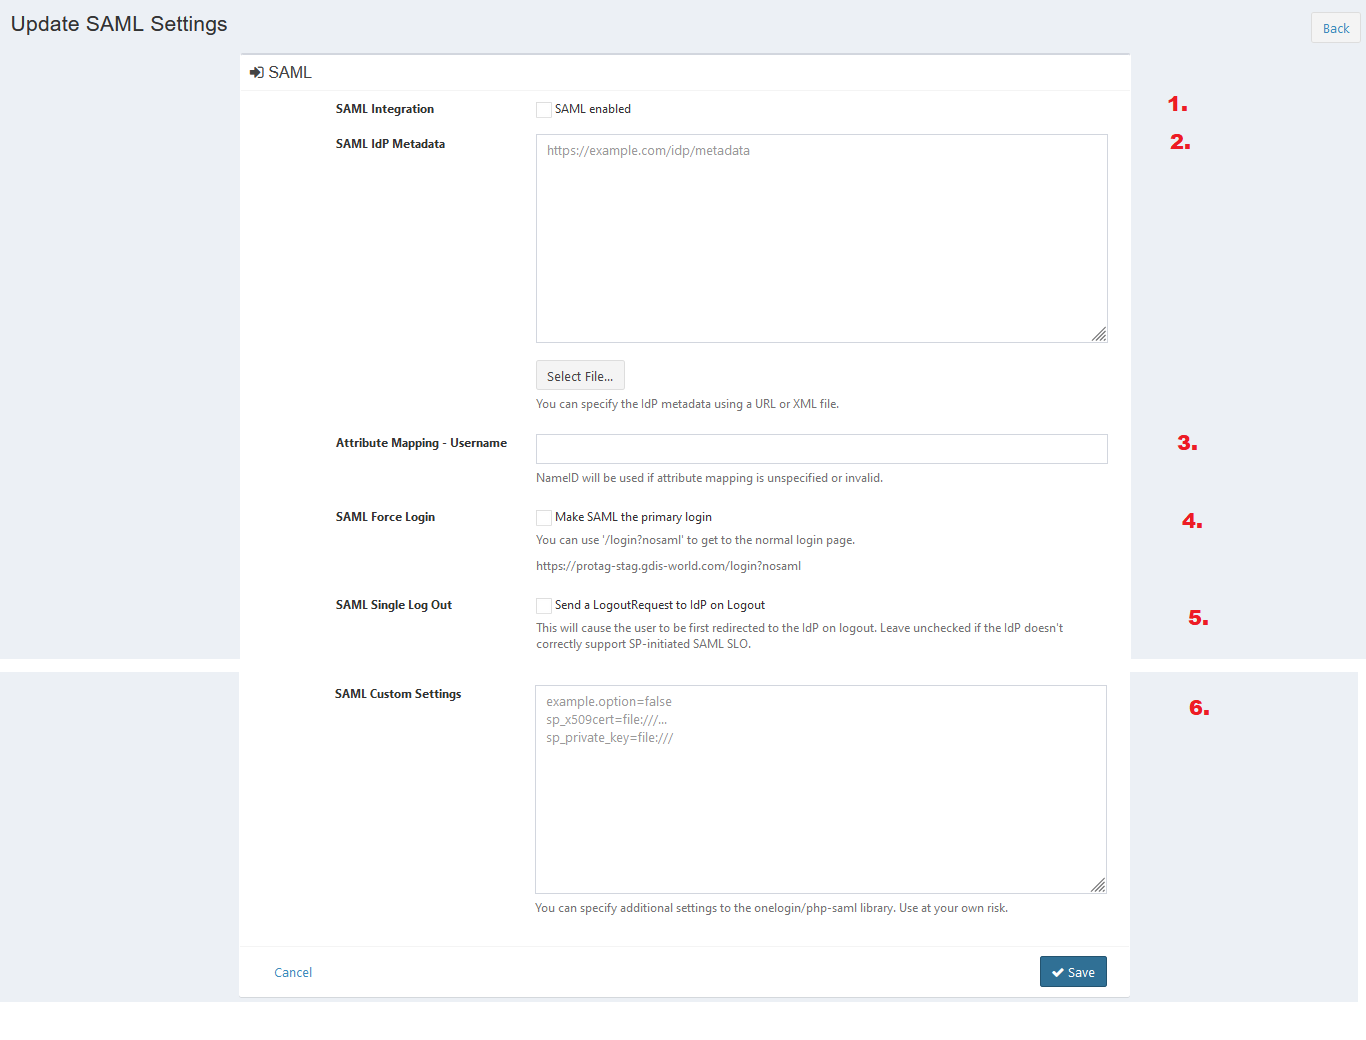
- Check the checkbox to enable SAML integration.
- Enter SAML IdP metadata. You can specify the IdP metadata using a URL or XML file. Click Select File button to upload XML file.
- Enter username for attribute mapping. NameID will be used if attribute mapping is unspecified or invalid.
- Check the checkbox to make SAML the primary login. When this checkbox is enabled, you will not see a login form of ProTag anymore when you go to the Snipe-IT website. Instead it will redirect you directly to the IdP SAML Login.
- Check the checkbox to enable system to send a LogoutRequest to IdP on Logout . This will cause the user to be first redirected to the IdP on logout. Leave unchecked if the IdP doesn't correctly support SP-initiated SAML SLO.
- Enter SAML custom settings. You can specify additional settings to the onelogin/php-saml library. Use at your own risk.
- Click Save button to finish your record.
- Click Cancel button to cancel your record.
- Click Back button to go back to the previous page.